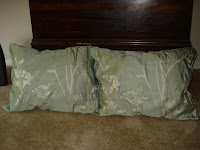
FIRST: COMFORTER PARTS BECOME SHAM PILLOWS
I had purchased a beautiful comforter set – one of my few splurges. The instructions said it was machine washable, but unfortunately that must not have been the case. The second time I washed it, the stuffing became bumpy and the corners started ripping and separating. After numerous attempts to contact the retailer, I resigned myself to the fact that I was not going to get a response. It was beyond repair too.
Trying to figure out how I could at least salvage something from it, I opened the rest of the corners, and removed all the stuffing. At the time, I had two decorative shams, but no pillow to go inside them. I only had my basic sleeping pillows. Not wanting to spend money on pillows to put in decorative shams, I decided to create my own with the stuffing from the comforter.
I used two basic pillowcases, and filled them with the stuffing. I secured the case opening with iron-on hem tape. Then, I put them into the decorative shams I had. They looked just like real pillows.
Total cost for two “pillows”: $0 and about an hour of time.
Copyright 2012 by Kristen DiNobile
SECOND: MISCELLANEOUS FRAMES BECOME CONTEMPORARY WALL ART
I had an old frame that I wanted to use to create a botanical print collage. Unfortunately, the glass shattered as I was completing the project. I also had two other frames that were missing the glass pieces. I knew there had to be a way to merge these mismatched pieces into something unique.
Using very thin nails, I hung the frames in an overlapping pattern. The frames are a mix of white and deep chocolate brown. In the dining room, I also have both types of frames, so this piece brings all the wood colors together.
Total cost for unique wall art: $0 and 10 minutes of time.
Copyright 2012 by Kristen DiNobile
THIRD: CURTAINS BECOME COMFORTER SET
So, after losing my comforter to the washing machine, I needed something else. After already investing money in the first comforter (more than I usually spend), I was not about to spend any more. I scoured my closets for some ideas. Recently, I had downsized from a home to an apartment. Therefore, I had some extra curtains. My favorite ones were these beautiful white panels I had purchased from JC Penney. They have a combo hidden rod pocket and tabs in the back. I had a total of 4. Could I somehow transform these panels into bedding? It was worth a try. The comforter seemed easy enough, but I also needed shams and a bed skirt.
I used my favorite “sewing” product, hem tape. I used it to attach two curtain panels together to create the bedspread – more like a duvet cover without the pocket. It worked out to be the perfect width for my queen bed. I used the other two panels to create a bed skirt and two pillow shams (for those new “pillows” I made in project #1, above). I measured the dimensions of my current shams and used them to create the new ones.
I did the same with the bed skirt. The reason I had enough material to make a bed skirt is that I don’t put the skirt on the bed the way most people do. I hate having to ask someone for help lifting the mattress to remove it for washing. Therefore, whenever I purchase a bed skirt, I cut out the entire center and tuck each side between the mattress and box spring.
When I made this skirt, I didn’t need to waste all the extra fabric that stretches under the mattress. I measured the sides and bottom of the bed, cut the curtains to size, and hemmed all the edges using the hem tape. Did I mention how much I love this stuff?
Note: I removed the curtain lining and just used the actual panel, which is made of a heavy-weight material. I don't like heavy comforters when I sleep. If you tend to be cold at night, and want more insulation, you could keep the liner and add some filling between the layers.
Total cost for a comforter set (with 2 pillow shams and a bed skirt): $4 for a roll of hem tape (which I already had) and about 2 ½ hours of time.
Copyright 2012 by Kristen DiNobile
Of course, I have plenty of other ideas for DIY projects, which I'll share with you in future entries.


